The Disorderlies Painting Blog

Thursday, April 27, 2006

Painting Desk nightmare

Although I have my own office at the house, my space dedicated to painting is entirely too small. This is a hold over from my last painting space in my Town House basement. However as I sat down to paint last night I discovered a key problem. I had no place to actually paint on my painting Table!

I've got a 4' by 2' folding table which is my dedictaed painting space. 1 Corner is occupied by my huge Red painting chest, perfect for taking painting on the road. Another corner is occupied with tools, paint brushes and Reaper Master Series paints, as well as my "bitz" box. This leaves me about 4 square feet total to work with, in an ideal situation. However as I looked at my sapce last night I realized had maybe, maybe 1 Square foot! I probably had 60 bottels of paint laying out, several miniatures taking up space, bags of static grass and ballast (for basing) and god knows what else. Now I don't know about you guys. But if my painting space is cramped nothing is going to get accomplished.

So my progress for yesterday? Cleaning the painting desk

Wednesday, April 26, 2006

Return to the blog

Ok, so finally getting around to updating.

Last thursday I went to DW and did some painting. I worked only on the drune figure that I posted about before.

Really was working getting the grey's and NMM's correct. Which I think I did! It took a large amount of time since it was a learning process and a little bit of playing around (using a light blue and grey mix for the highlights).

In the end I was very happy with how it came it. I have nice highlights on the grey and the shades are nice and dark. A very good balance and not flat like I was dealing with before.

Last night I opened up a box of Trollbloods and started the task of the Hordes.

First thing.. I strongly dislike all of the box casters. The poses are just bad.

Soooo.. .with a dermal cutting disc attached I started the hacking of the troll blood warcaster.

First thing to go was the back half of his dandellion neck piece. Having some amulets around his neck is one thing.. looking like a reject from alice in wonderland is something else. I will putty up the back to look like a chain or something that the amulets are hanging off of.

Next thing I am working on is reposition the axe. Holding an axe right next to the blade has no point. You can't attack with it in any fashion other than punching and if you do that, why do you need an axe handle. So I'm moving the position of the blade higher and making the hand hold the axe handle. This is a little tricky cause the part he is holding happens to be the thickest part of the axe. So I need to figure out a way of making the transition smooth.

And the final piece I think (subject to change), is moving the amulet hand/arm. He has a nice ridged arm with an amulet tied to it. What is the point? The amulet is suppose to keep frenzied beasts from charging him.. don't you think it might require sticking it in the face of the beast or hanging on your neck? Why ducktape it to your palm when your arm is locked in a fixed position (the armor looks metal and has no room to bend). Ideally, I will reposition the hand so the amulet is vertical and facing the direction he is looking. This probably will require some adjustment of the head and neck since his arm is pointing 90 degrees away from the direction he is looking...

I will post pics tonight.

Tuesday, April 25, 2006

Bad Day for the M8

From the demo Rob and I ran for Paul and Rob F. - it died as a result. Troopers are crunchy!


Aaron

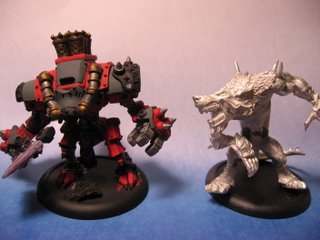
Warpwolf Size Comparison

Here's the size comparison Tim asked for.

I finished all the Green Stuff up on the Circle models last night - hopefully I will be able to prime them tomorrow.


Aaron

Monday, April 24, 2006

Progress, at last!

So, this Saturday and Sunday, I finally got around to working on some minis again.

Saturday, I cleaned and drilled Kaya and the Warwolf while at DW playing some Arkham Horror. Cool - the models look good and are pretty clean.

I also got to finish the reds on Karchev and the Kodiak.

Sunday - cleaned and pinned the Argi and assembled the Warwolf - now they just need greenstuffed and they will be ready for priming - I hope to get that on tonight.

I also got the first layer of Greys on the Khador.

Good times.


Aaron

Master Tormentor take II

I scored a little time to work on Morghoul Sunday night, about ½ an hour or so just enough for me to be perplexed with what to do with his armor. Eventually I decided a highly limited “drybrush technique’ on his armor using my size 1 miniature W&N series 7 brush. The ned result seemed pretty good last night, I wonder if I will still feel that way when I get a chance to work on him again on Wednesday. He WILL be completed this week!

Photos this week? eh.... we'll see

Friday, April 21, 2006

SST Grizzly Exosuits

And they call it.. Tormentor love....

Got a chance to sit down with Morghoul last night and finished off the skin tones, easy since there is so little…. Painting him up will be interesting though. The armor on him has much more texture than I would have thought from the published pictures. All of the armor plates and “dimpled” It’s not a bad look but I’m very glad I’m not doing NMM on his armor. I’m going with “enamel” armor which is essentially NMM with colors predominantly other than grey. There is so much textrure that I will likely be going back to selective drybrushing rather than actual layering on this fig. Actually it will likely be more of Dry Brush strokes but following selective layering color application.

Now that I’ve got the models primed and can see the details better. Most of the Skorne models have either the dimple effect or scrollwork on most of the armor plates. There are a few plates which do not, but most seem to have it. Morghoul will be my “free time” project this weekend, I post updates on him Sunday night or Monday morning. With pictures if I fell especially productive.

Thursday, April 20, 2006

Cryx Bane Knights

Progress at last!

Well, I was finally able to sit down last night and do some more painting.

I got another layer of reds on (only 2 more to go!) and did the base coating + wash on my Tanker Bug.

Hopefully more to come this weekend.


Aaron

Tuesday, April 18, 2006

Troll Blood assembly

Yeah I may be avoiding something today….. whats your point?

I got more done than just the Skorne Base work last night. I also got ½ of the Trollblood Warpack assembled and cleaned. Now by cleaned I mean the mold lines have been filed or carved off. The next stage of scrubbing with soap and water is still needed to remove all of the mold releaser residue.

Madrak: Is an interesting fig, but pretty busy. I think they went a little overboard with his sculpt. There is a ton of detail and “movement” on the fig. But looking at him there is so much detail and movement on the fig I’m not sure what’s what by looking at it. This should get easier once I get the primer on. Currently I am a big fan of pinning, I pin things that really have no need of it, but I feel more secure with the fig if I do it. Plus I have a dedicated “hobby” power drill with a chuck that will take all but the smallest of the pin vice drill bits. That being said I set up Madrak arm/axe joint for a pin but I’m leaving the axe off for right now. I think it will be easier to paint, plus the axe portion now has a handy extra long pin I can use to hold the axe for painting, before trimming it down for the actual joint.

Impaler: When I first saw images of this fig I did not think much of it… But now that I’ve got him assembled I am quite pleased indeed! The pose is nice and it is easy to forget how imposing this figure is in a picture. Place him next to standard WM small base models and WOW. This guy goes together pretty easily excepting the midriff syndrome. Much like the Axer and most confrontation wolfen, the figure is cut at the waist line. I’m sure this is easier on the molds, and allows for a more dynamic sculpt, but it’s a pain to get a solid joining. My pin didn’t quite line up, but a little forcing and gluing got his mid section connected. I also pinned his chucking hand to the arm, but decided against pinning the balance arm, and Head. I’m leaving his Spear quiver off for the time being. It should be easier to paint up his back armor this way.

Skorne Basework

The Skorne Warpack is now fully assembled, custom bases made, painted, and models suitably altered to “stand” on the base appropriately. As previous described I made up custom bases for my Skorne using Cork, Aquarium rocks, and a mixture of Sand and medium Ballast. Once painted these things look pretty good. However there are two items which I need to deal with. I decided to make up the bases so they would be ready to go before having the Skorne on hand. So I guessed where the feet would need to go based off of pictures and a little common sense. Second since the slotta holes and peg holes have been covered up I’m attaching these to the bases with “anchors”

For the Most part the figures feet fit on the bases just fine. Morghoul and one cyclops needed to have one foot repositioned to make more realistic contact with the base. Putting the anchors in is also fairly easy. First I sawed off the pegs and slotta tabs off the miniatures. Next, I took my pin vice and drilled a hole straight up the leg then identified and drilled out a matching hole in the base itself. I bent a length of medium gauge paperclip into an “L” shape so that it would have good contact with the underside of the base and provide a good attachment point up into the leg of the miniature. The important part here is to ensure you’ve got a good solid 90 degree angle on the anchor and that you have sufficient length to get as much contact as possible in the miniatures leg.

Once the miniatures are painted I can drop them right on their respective bases. To ensure good contact I’m intending to go with a 2 part epoxy. It’s likely more than I need to go but I want that bottom anchor incased in the epoxy so it will not go anywhere. That way I don’t have the Elmer’s glue as the weakest bond keeping the miniature on the base.

Monday, April 17, 2006

Weekend Progress -Tim

Despite a busy weekend I still managed to be fairly productive. Playing the Bug out Boogey from work at about 12:30 on Friday, I got to prime, and paint, all my custom bases for the Skorne Warpack Models. I’m using 1/8” and 1/4” cork plus some aquarium gravel as the basis, then painting them up in a red desert motif. I still need to add some selective static grass in some of the crevices, to really pop some more detail on the base. I also went through and finished off a GW inquisitor model for the BLOG INITIATOR, special request brought up on Friday for yet another one of those figs that has been ½ finished and staring at me for upwards of 2 years now. Of more important news I received word from on high that Privateer actually finally came through for their Press Gangers. So I headed up to Columbia and grabbed myself a big ole box o’ Skorne!

Got home in the evening and started up with the assemblage! As fair warning, andy one picking up the Skorne or Everblight Warpacks will have fun assembling either the Titan Gladiator or the Carnivean. I, mostly, followed the assembly instructions for the titan located in NQ#4. In the end I wish I had better skill with sculpting green stuff. Although there was little that needed to be done, the miniature will, in the end, be worse off for my inept sculpting capabilities. But to the good and juicy details, the titan is wonderfully executed. If you like the model concept the work in hand is great, but a pain to put together. However if you use a fair amount of green stuff as filler, structural support and for its adhesive qualities, The mini comes together nicely, and is solid. Once I finish the first one, pictures will be posted for all.

Thursday, April 13, 2006

No time, No updates

I haven't had much time the last couple of days to do anything other than work, eat and sleep, so I haven't made any progress on the Khador.

I'm taking Friday off though, so hopefully I can still finish up the Reds and maybe get a first layer down on the Greys.

Wednesday, April 12, 2006

Thy name is Motivation.... Where art thou

Apparently Tuesdays are not productive nights for the Disorderly painters, even with the gaming Mecca being closed up last night. With class Monday and Tuesday nights I'm SOL on the painting, only 4 more classes to go though and then I should be operating on a fairly regular basis.

So as I look over my painting desk last night yeah even though I lack the time to paint I am still drawn towards its siren call) I notice I've got a handful of figures I've started and then abandoned for one reason or another. Plus I've always got that new unit that has already been cleaned and primed for a game, but still hasn't seen paint. Then there are the precious ones. Minis that I acquired for (the sole reason to paint, and yet they still sit in Blisters or the rare few attached to semi precious stone as a mounting base, ready for my full, undivided attention, that never quite materializes.

Off the top of my head these are the figs staring at me for having started and then left them greener pastures.

Confrontation
Sered Templar Commander, 3x Warriors of Blood

Privateer Press
Reinholdt Gobber Speculator, Ordic Pistolleer

Infinity
3x Line Khazaks

Sacred Blade
Divine Spirit

War Gods Olympus
Mycean Titian Hunter

I can’t possibly be the only one this happens to. What do you guys have staring at you that demands your attention?

Tuesday, April 11, 2006

Aaron - Monday night progress (with pics!)

Some pics of last night'swork. I'm finally starting on the highlight layers, which means there's a light at the end of the tunnel. Not pictured here is Karchev's body system and the armor plates protecting him. They are being painted now as well, I just didn't take any pics.

After I finish these reds, I still need to do the greys and then go back and finish up the metals (only the base coast + a wash are down now).

These are the first pics with the new camera, so I'm still figuring things out. I definately need a better lighting setup and need to adjust my white balance. Overall, I'm pretty happy with it though.


1 hour challenge : hour 4.5 : Drunes

I finished up the leather butt flap the guy is wearing except for going back with a darker brown to help the stitching's stand out.

I started with a base of reaper Brown leather(1:2:1) (I think that is what is was called) and did the shadings by adding vallejo Flat earth at a 1 part flat earth and 2 part brown leather to start and slowly shaded it.

The highlights were done with a reaper Buckskin leather, which is a more yellowish leather and brought out a warmer highlight.

This leads into the discussion for this message.

When doing highlights do you mix warm highlights with netural or dark highlights?

For example. The drune warrior's chest is black highlighted up to a grey which is a cold or netural highlight to me. But his legs, I highlighted up to a warmer highlight with a brighter yellow leather.

Do you think it's best not to mix warm and cold highlights?

Monday, April 10, 2006

Also from the assembly frenzy

So, there I was looking for a weight to counterbalance my absurdly top-heavy Stormblades Standard Bearer. Most of my gaming stuff remains packed up, so I was scrounging. And I figure, hey, a penny is about the right size, let's give it a whirl.

Take penny.
Take GW-standard wire cutters.

Now, I'm not the strongest guy, but I figured I could handle this. I didn't realize that pennies were made of titanium layered with adamantium.

Prong of the wire cutters snap right off and shoot through the air. Penny *barely* has a scratch on it.

...

Didn't get a chance to prime this weekend, maybe today, bebe-permitting.

Aaron's Weekend Notes

1. Little free time = teh Suck!

2. Got only one more layer of Red on, but the models are looking good. I hope to be able to start the greys by Friday - we'll see - lots of new toys coming in this week (new camera and Conf. Dogs of War + models).

3. Got started on my Cynwall - cut the base tabs and filed down the remains on the feet of 8 Selsyms.

4. New nephew (Jakob Logan) was born Sunday, 4:38 p.m. 8 lbs, 11 oz.; so I watched my other nephews while my sister was in the hospital - damn exhausting having 2 kids and 2 puppies to look after all day. I crashed as soon as I got home (hence the lack of further painting).

Monday morning Surviving the Weekend

Well this last weekend has been my most unproductive painting weekend in quite some time. Thanks to work/school/ and the new Damn puppy most of my weeknights are chewed up. Thankfully due to impending school projects and house work I got a total of 1 Fig finished over the weekend. Finished off Boomhowler which finishes off that unit for Warmachine. I’ve got another 2 Trollkin to throw in there some time, but that can come later. Pics were taken but no time to translate them for web use, maybe later this week. The Mycean titan hunter saw a lot of work done on him, but I neglected to remember I’m using NMM on him and his weapons are taking longer than I expected.

Friday, April 07, 2006

Last night's assembly report

Finished assembly last night:
Renegade #2.
Stormclad.
Proxies for Gun Mages.
Hatamoto for Urban War.
Bunch of mniscellaneous figs.

Repairs completed:
Ironclad #2. (Fixed arm.)
Mangler (Fixed arms.)
Stormblades Banner (Though it's still frikkin' topheavy.)
Boomhowler (Arm put back on, sure it will fall back off.)

Tomorrow, in the parking garage at work: priming.

1 hour challenge : hour 3.5 : Drunes

So it turn's out it's "5 hours of painting this week" challenge"

I put the female drune off to the side since once the skin is done on her most of the other work will be NMM and some bone or wood? Not exactly sure what she is holding in her hand.

The male drune is going well. I am really liking the black->grey skin tones. It is really making the exposed skin part stands out.

I continued working on the leather (I actually need to start writing down the colors and mixes I use). When I paint something I normally will start with the Middle color and then paint shaded part's followed by highlighted parts. It seems the easy way to go through the blending on the various parts.

Important note.. Rob stop glueing things together before others paint them.. His axe is block a fair section of his body and I have been unable to pop the axe off with out messing up the figure.

Aaron - Thursday painting update

Well, one more layer of red down - they are starting to move a lot quicker now. I would anticipate getting the reds done on Karchev and the Kodiak Saturday, hopefully - I think Sunday will be taken up by watching my nephews and Saturday night is Poker night, so we'll see.

In other news, I bought the Canon A540 last night with a package, so I should be able to start taking some pics of my progress next week.

Thursday, April 06, 2006

HORDES Skorne Cataphract Arcuarius

Discussion on Primers

Primer may or may not be a big thing on figures.

I have just been using what ever generic primer I find at DW or other store. Normally they work out fine, sometimes the primer will not go on smooth and I end up with a "dusty" figure.

I will normally try and do just one pass, not very heavy but probably heavier than I should. And this means flipping the figure several times to get all the angels.

I have read a few articles on how to prime figures with everything from one coat, let dry, next coat, etc etc to using a hair dryer to help harden the coating.

Has anyone played around with different priming methods?

Aaron- Wed. night progress

Well, I was able to get another layer of red down - it is starting to look smooth and the color is starting to lean more toward the final product - that helps keep me motivated. I hope to get 2 more layers on tonight.

I think I'll be ordering a Canon A540 to take some pics - it can be in early next week if I get off my ass and do the ordering.

Wednesday Night progress - The Christmas Chaos Spawn!


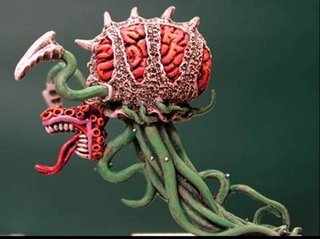
So begins my way of disappointing the crowd. Yesterday I indicated pictures may be up of Boomhowler and the Mycean Titan Hunter. Well that didn’t happen, as a favor to the initiator of this blog I photographed and wrote up a tutorial on how he can paint his Tyranids. This would typically be somewhat problematic since I don't actually own any Tyranids, but I managed around that by diving through my stack of Reaper figs to find a suitable surrogate. Reaper Warlord Devourer of Musharraf, which will eventually be used as a chaos spawn in my Thousand Sons Army for 40k. The whole process took me 2 ½ hours from the time the first coat of primer went on to the final brushstroke completed, including time to allow the primer to dry.

The technique is quite simple and works wonderfully on any creature full of Bone and exposed Muscle to get a quick table top miniature completed. Dry Brush the whole fig with Reaper Pro Series Hill Giant Brown, followed up with Reaper Pro Series White Leather, then Wash your colors in, and possibly a final highlight dry brushing in the appropriate color. In hind sight I should have used purple for the Tentacles, but instead I’ve got the Christmas Chaos spawn.

Now bear with me as I try to upload the picture

1 hour challenge : Day 3 : Drunes

Can't say I got as much done as I should. Would say half an hour over an hour.

Finished up the skin on two drunes, started putting a base coat on to the leather of the guy.

I'm going to try NMM on these guys again since the drunes i didn't dip have it. That will slow me down since I'm still learning it.

So normally I have a movie playing in the background. Last night was Carnival season 1.

Wednesday, April 05, 2006

Khador Red Guide

My Khador red:

1. Cadmium Umber Red: Glaze Medium 3:2
2. Cadm. Umber Red: Gory Red: Glaze Medium 3:3:4
3. Gory Red: Glaze Medium 3:2
4. Gory Red: Flat Red: Glaze Medium 3:3:4
5. Flat Red: Glaze Medium 3:2
6. Flat Red: Carmine Red: Glaze Medium 3:3:4
7. Carmine Red: Glaze Medium 3:2
8. Vermillion: Glaze Medium 3:2
9. Transparent Red: Glaze Medium 1:15 (yes, that ratio is right - it's a glaze)

1 hour challenge : Day 2 : Drunes

Putting brush to figure time oh yea...

The first two figures I'm working on is one of the drune chicks..
no clothes.. some metal(?) wrapped around her.. holding sticks to punch with..

And what I think is a named guy. Looks like a persecutor but bigger and more important looking.

I start at the lowest level and start working up. So in this case it was skin. The guy didn't take very long but the chick is all skin and I'll have to finish her up tonight.

I was doing a dark grey to grey higlights but overall thought this left the figures very netural. So this time I'm going black to sharp grey highlights. I'm trying not to over do the blending since I want it to be a sharp separation at the highlights.

no pics today.

Cygnar Trecher Captain Finn

Painting Recipes -Tim

Aaron made an excellent point in response to one of Rob's Posts. Painting recipes can save a massive amount of time. In the past I have typically taken each model as individual and painted it up however I see fit. While this is excellent practice at learning new techniques and new paint mixtures to get a desired goal it is not efficient for mass painting.

Over time I have come up with a few recipes that I refer to on a regular basis and have imported a few from friends. So I suggest we each post out own favorite painting recipes so that we can pull off of each other, and broaden our color palate. Army specific colors should still be written down of course. But what is the base for doing certain colors?

I’ll start with the ones I have on my thumbdrive at work. I’ll update more tonight or tomorrow.

NMM Gold -1
A base of reaper walnut,
a wash of Golden Acrylic Raw Sienna
A glaze of reaper walnut again to get the shadows going once more...
Highlight with a mix of Raw Sienna / VGC Sunblast yellow 2:1
then VGC Sunblast yellow
then VGC Sublast yellow / white
then white


NMM IRON
Directly on the primer
A heavy wash of VMC Intermediate blue (repeat as necessary to get
depth)
A light wash of VMC Intermediate blue / VMC Black 1:1
A light wash of VMC Smoke or Smoke Ink (rather interchangable imho)

That gives you the base color. Then, begin to highlight with
Intermediate blue, followed by white.

GEMS
Paint the gem white,
then paint the dark area (into the light) a dark color that'll work with the basic gem color,
with the white reflection spot in the center....
then do a few glazes of the actual gem color over the entire
thing.
Robert's Tuesday Night Update

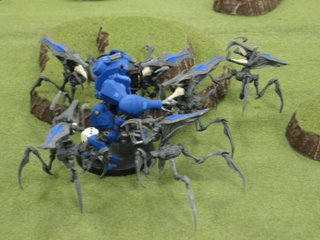
Did not make a ton of progress last night - started basecoating the blue on my Cygnar warjacks. Realized that I haven't really thought out the rest of the colors on the things yet....need to do that!

Also got some magnets from Brian (thanks again Brian) to try and use for making my Tyranid Carnifexes weapon-swappable. After about an hour and a half of working with them, I've discovered:

1. Polarity is a bitch
2. These things are too small and fiddly
3. Dammit, I'm going to probably just end up gluing stuff on.

--Robert

Tuesday night progress

Well, I was able to get the second coat of the base color on Karchev and Kodiak #1 - this seemed to go on much quicker and smoother than the previous, which I'm very happy about. Hopefully tonight will see progression to the second Red I use (of about 12 layers).

Base layer 1: 3:2 VM Burnt Cadmium Umber Red: Glaze Medium.


Aaron

Back to the bases –Tim

The first day of this whole inspiration blogging crap and I achieved little. First, I picked up some cheap Ceramcoat paint and some new “Dry-brushing” brushes to handle the planned Skorne bases. Secondly I finished assembling the Skorne bases. All they need now is a coat of primer and then slap on the paint. Once that’s done I’ll snap some pictures. Hopefully the Skorne minis will fit appropriately. I attempted to ensure free areas on the base for the miniature to be secured to it, however without the miniatures in hand it is a best guess estimate. I’m fairly certain the will fit with minimal problems.

Tonight, however, should see the completion of Both Boomhowler and the Mycean Titan Hunter. Maybe with enough time left over for my first pictures.

Tuesday, April 04, 2006

Aaron's Khador

Ok, so here's what I need to do for Khador and approximate progress:

Karchev - 10% complete - only 1 layer of Red so far
Kodiak 1 - 10% complete - only 1 layer of Red so far
Kodiak 2 - 0% complete - needs to be primed
Behemoth - 0% complete - needs to be primed
Mortar 1 - 5% complete - steel metals started
Mortar 2 - 0% complete - needs to be primed
Bezerker 1 - 85% complete - Reds done - need more metal work
Bezerker 2 - 85% complete - Reds done - need more metal work
Widowmakers - 10% complete - needs Reds, Metals and Browns
Grey Lords 1 - 5% complete - needs lots of work
Grey Lords 2 - 0% complete - Priming complete, ready to start painting
Manhunter - 5% complete - metals in progress

I'd like to add a non-epic Sorscha to the painting que as well as the epic Vlad and some Doom Reavers. There's a lot of work to do, me thinks.


Aaron

Cynwall Comments, Please

So, here's what I was thinking of for a 400 point force. I don't have most of these models yet, but soon, they will be mine. I think I should be able to get them done by August, I hope - and I should be able to use them for Dogs of War, too.

1 x Maneran + 20 points of artifacts
1 x Musician
1 x Standard Bearer
3 x Akhamials
1 x Dragon
1 x Asadar
1 x Veteran w/Sabre

Thoughts?


Aaron

1 hour challenge : Day 1 : Drunes

First night, I wanted to call a rain delay...

I had to go prime in the laundry room of my apartment, I bet management would not like that much if they found out..

So I kept the priming light, which meant I had to do a fair amount of brush on primer.

I'm going with a white primer since I like to be able to see the details well and, at least for me, they can get lost on black primer.

I also started working on the new bases for them. Using some standard cork for rocks and maybe some twigs or something since the Drunes are suppose to be in a big dark forest I think.

The Long and the Short of it (Goals)

Short Term
In the next 3 weeks I need to finish 8 figures. I’ve been working off a personal painting challenge since September-ish as a way to keep myself motivated to paint over the fall and winter months. Eventually the goal came to 37 figures by April 22nd, a ridiculous amount of time to paint 37 figs. Well here I am on the last 3 weeks and I’ve got 8 to go. Shows how well that worked.

So in the next 3 weeks I intend to finish the following
• Warmachine
o Boomhowler
o Reinholdt
o Ordic Pistoleer
• War Gods Olympus
o Mycean Titan Hunter
• Urban War
o 2x Androsynths with Grape Guns
o Artemis Class Biomech
Last fig is still open depending on how much time the previous seven have taken.

Long Term
As many of us know Privateer Press is releasing HORDES in the next few weeks and I intend for this to take the bulk of my painting attention over the summer, in addition to the damn home projects that my wife keeps throwing on me. On April 22nd I will be diving head first into 2 factions right off the bat: Skorne and Trollblood. The long term goal is to stay on top of the Skorne Releases and Build myself up to a nice 500 point army painted by the end of summer, with the Trollbloods falling a little behind the Skorne

This of course depends on PP release schedule which we all know to operate exactly like the prophecies of Nostradamus. You can’t predict shit with it, but in hind sight they make perfect sense and can apply to numerous situations.

Painting Motivation Oh my...

For the past year and a half, I've been a lazy a.. gimp when it comes to painting. So, some motivation would probably help.

With my painting style (working on one fig till it's done for best results), I really don't work well on units which is not that big of a deal since I'm mostly on small forces scale games right now.

Right now on the project order list:

  • Drunes(conf) (*cough*notmine*cough*)
-- Working off a trade with these. I had them painted so they were ok, but I wanted better.. after several tries.. I kept about 7 and dipped about 8 or 9. Time to try again.

  • Samurai goblins(conf)
-- I'm in the mood to convert these guys up into a DoW looking force. More putty, more wear and tear. Really need to decide how I want them laid out. Right now people like the bamboo look bases I'm going for.

  • Khador (warmachine)
-- I only have one force righ now (pieces for others but they don't count) so it is time I finish them up. Most of the army I'm happy with and almost done. Need to finish up Karchev and a mortar.

And another endless list of things..

Right now, I'm going through a "1 hour a night" challenge with Rob. Pictures will follow.

Robert Post

Right. So here's what I want to be working on:

Warmachine - Cygnar and Mercs

Warhammer 40,000 - Tyranids.

My Cygnar I'm planning to go with the standard blue schema. I'm looking at Reaper's BRIGHT BLUE paint currently and plan to try that.

Mercs - I've got the Magnus battlebox primed up and ready. I am considering a purple look for these guys - sort of a "faded royalty" feel. I am not sure on this yet.

Tyranids - This army has been partially painted by Damon and then Tim. Tim has assured me that it will be easy for me to paint - DESPITE previous evidence to the contrary when using the words "easy" and "paint" in the same sentence as "Rob". Still, I'm going to give it a try, because no one else wants to paint for me.

I've been on an assembling kick lately - Tyranids, Dark Elves, and before that, a lot of Warmachine stuff. I finally broke out the black primer over the weekend and got started with that. Warmachine stuff is a bitch to prime effectively when assembled - I spent a good portion of time last night manually fixing problem areas with just some Reaper black paint.

Tonight, I hope, I can start basecoating the blue on my Cygnar.

--Robert

What an Idea!

Now this would have been useful a few months ago when I started my own personal painting challenge! Now I can infect the whole readership (apparently 2 so far) with my personal drivel. Excellent

Tim

What I'll (mostly) be working on

Well then, I guess I'll be chronic(WHAT?)ling my Confrontation and Warmachine painting here - maybe even some other games as well as some terrain production for the rest of the slackers.

So here's some goals:

1. Fully painted and based 750 point Khador Steamroller tourny force (2 warcasters and all...) by Aug. 1

2. Fully painted and based Cynwall 400-point army for Gencon (0% complete at the moment)


Aaron

First Post

Testing to make sure this works.

Screw you, hippies.

--Robert